Skip to content
Online Photo Prints
← Photo stories & tips

Autumn photographs you will want to keep on the wall

Make more of autumn light, colour and small details with a simple shooting plan—and choose one favourite photograph to enjoy beyond the season.
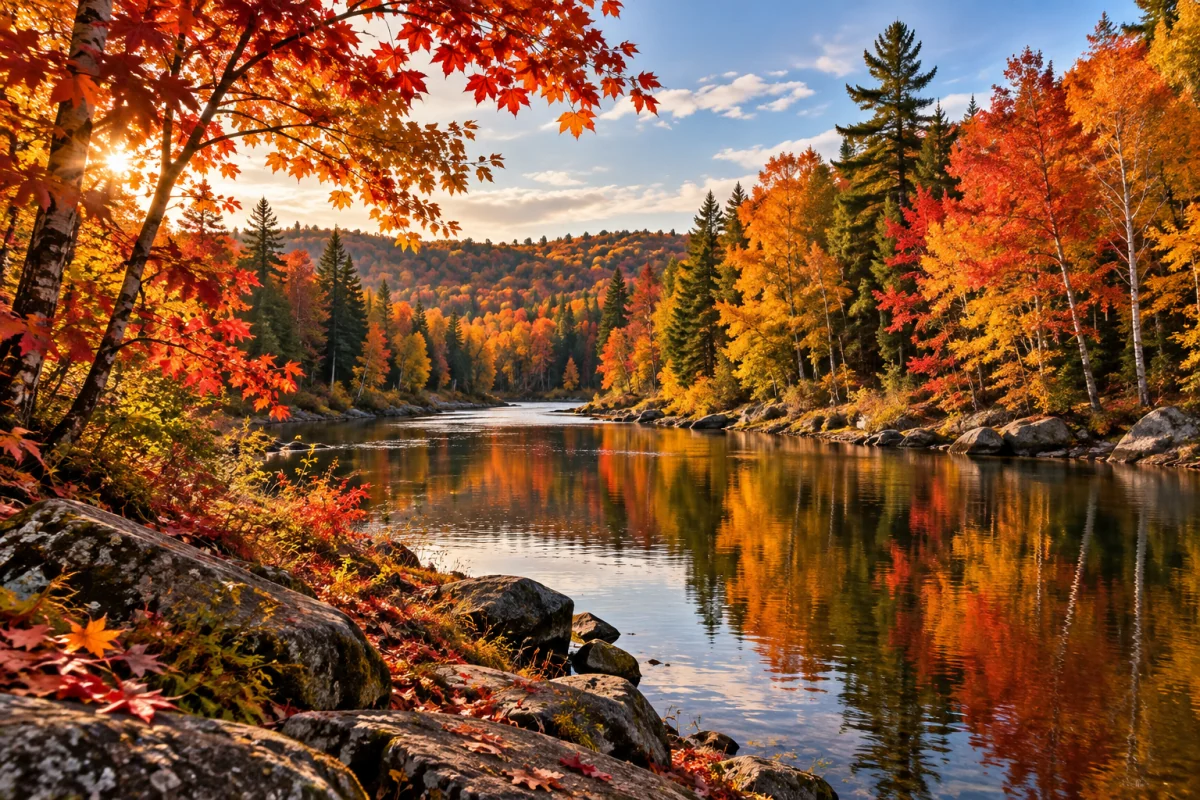
Vivid red, orange and golden autumn trees reflected in a quiet river in warm afternoon light.

Autumn can make a familiar walk feel completely different. You do not need a dramatic destination or a new camera to make photographs worth printing. A favourite path, a garden or a quiet roadside view can be enough if you pay attention to the light and simplify what is inside the frame.

Try this small project on your next outing: bring home one wide view, one personal moment and one detail. That gives you a story to print, rather than a camera roll full of nearly identical trees.

Follow the light before chasing the colour

Look at how the light reaches your subject. Low sunshine can bring warmth and shape to a landscape, but bright patches may pull attention away from the person you are photographing. Moving a few steps can change the balance more than a strong filter later.

On an overcast day, try close views of leaves, bark or a portrait under open sky. The gentler contrast can make a busy woodland easier to photograph. If the scene is very bright and dark at once, check the image you have taken instead of assuming the screen preview tells the whole story.

Give the photograph one clear subject

A forest contains plenty to look at, which can also make it difficult to photograph. Choose a single tree, a bend in the path or a person in a simple patch of light. Look around the edge of the frame for distracting branches, signs or bright gaps.

Try a lower position to include a foreground detail, then try a cleaner view without it. Make both versions before deciding. For portraits, leave comfortable space around the subject and avoid placing a tree trunk directly behind someone’s head.

Leave a little room for the eventual print

If you think the image might become a wall print, take one version with extra space around the subject. You will have more flexibility when choosing the paper shape or a canvas edge style. A composition pressed against every edge may be difficult to adapt.

Photograph a landscape both horizontally and vertically when the scene allows. A vertical picture might fit the narrow wall beside a doorway beautifully, even if the horizontal version felt more natural at the time. Our print size and crop guide explains the trade-off.

Edit for the memory, not the strongest effect

Begin by straightening the horizon and adjusting brightness gently. Compare the edited image with the original before increasing colour. Autumn leaves can quickly become implausibly orange, and a strong filter can give faces an unwanted tint.

Check the photograph on a comfortable screen brightness. A glowing display can make an image feel brighter than a print reflecting room light. Our colour profiling helps us work consistently, but it cannot make every customer’s display match a printed surface. Contact us before ordering if a particular colour must be matched closely.

Bring one photograph into the room

Choose one favourite a day or two after your walk. A little distance can make the strongest composition more obvious. Imagine it in the room where you will see it most often. A warm landscape may suit Bamboo Fine Art paper; a broad view can have a lovely presence as a Canvas Print.

Keep a little of the season.

Explore Canvas Prints for your favourite autumn view, or make a small seasonal collection with Photo Prints. Check the original file and any Resolution warning before choosing a large size.
A little more inspiration

Find your print

What would you like to print?

Choose a print style. You’ll pick your size and upload your photos next.

Help
A little guidance

Here to help.

Open a topic for quick help without leaving this page. Full guides and support are available below.

Choosing your printsA good place to start

Choose your product before uploading: Photo Prints for albums and frames, Canvas Prints for a stretched wall print, or Fine Art Prints on Hahnemühle Bamboo paper.

Choose a size and paper or canvas edge style on its product page. You can refine those choices and the crop in the editor. To print the same photo on a different product, start from that product’s page.

Full guide: Choosing your prints
Uploading your photos
  1. Choose your product, size and paper or edge style, then select Upload Your Photos and sign in if prompted.
  2. Start a new gallery or choose a compatible existing gallery. Add up to 50 photos per upload.
  3. Keep the window open while the files upload and process. Select Done when offered; the site then checks that your gallery is ready.

If processing is unfinished, use Try Again to check the same upload. Check your Photo Library before uploading the same files again. Uploading alone does not place an order.

Already in a gallery? Add More Photos opens the uploader right there. Choose the new photos’ size and paper or canvas edge style; existing photos stay unchanged. Use Check again for an unfinished upload, or Back to editor and check before repeating it.

Full guide: Uploading your photos
Editing your photos
  1. Choose each photo’s print size, paper or edge style, and quantity.
  2. Drag and resize the crop box to keep the part you want. Use the rotate and flip controls to change orientation.
  3. Use Adjust to open the larger editor. Crop changes the selected picture area, Finetune adjusts light and colour, and Filter tries a ready-made look.

Zoom +/− lets you look closer without changing the crop or print size. Undo/Redo steps through available edits. Revert resets them and can reset the crop; use Close without applying to keep your saved gallery as it was. Choose Apply Changes to save, or Close (×) to leave without applying. Wait for the save, then check Preview.

For several photos, select their checkboxes and choose Adjust Selected. Quantity is per photo: 2 + 3 + 0 means 5 prints, with the zero-quantity photo left out.

Resolution warning? Your photo may look blurry or pixelated at the selected size. Choose a smaller size or upload a higher-resolution original for the best results. You can still order it as it is.

Changes save automatically. Wait for pending saves to finish and resolve any error before leaving or clearing browser data. Use Add/Update Prints to send the accepted selection to your cart.

Full guide: Editing your photos
Previewing your prints

Select Preview beneath a photo for a closer look, or open Print Preview Gallery to review the gallery. Check crops, orientation, sizes, finishes and quantities.

Return to Print Editor to make changes. If a preview is out of date, let saves finish, then use Refresh previews or the retry control shown.

Previews are not life-size or exact colour proofs. Canvas previews are flat and do not show the finished sides. A clear-looking preview does not guarantee a sharp large print; review any Resolution warning in the editor.

Full guide: Previewing your prints
Galleries & reorders

Open Photo Library to find your galleries. Filter by product or change the sort order, then open a gallery to edit its photos. Use Edit Gallery Title beside its title to rename it, or Add More Photos inside the editor to choose a size and paper or canvas edge style, then upload straight into that gallery. Wait for processing and Done; existing photos stay unchanged. Use Check again if readiness is unconfirmed, and check the gallery before uploading the same files again.

When available, Reorder restores only that gallery’s previously purchased prints, crops and quantities. Review the confirmation and current prices before adding the reorder to your cart. Your current gallery settings stay unchanged.

Read deletion prompts carefully. Deleting a gallery does not cancel an existing order. Keep your original photo files.

Full guide: Galleries & reorders
Cart, checkout & delivery
  1. Check your crops and quantities, then use Add/Update Prints in the editor and wait for confirmation.
  2. Review the cart’s sizes, finishes and quantities. Cart rows group matching prints, so one row may contain several photos.
  3. Apply a promotion code if you have one and check the updated total.
  4. Proceed to checkout, confirm your Canadian delivery address, shipping option and final total, then complete the required agreement and payment steps.

We accept orders for Canadian delivery addresses only. If a payment result is unclear, check My Account → Orders before trying again.

Full guide: Cart, checkout & delivery

Use the account icon or My Account to sign in, create an account, view orders or update your details. Use the same account that uploaded your photos.

If you cannot sign in, use the password-reset link and check your email, including spam or junk. Never send passwords or reset links to support.

Changes save automatically, but wait for uploads and pending saves to finish before clearing browser data. Sign out on shared devices and keep your original files. Updating an account address does not change an order already placed; contact us if an existing order needs attention.

Full guide: Your account & privacy
Something not working?
  1. Read the message and note any support reference before refreshing or clearing browser data.
  2. For an unfinished upload, keep the original tab open and use Try Again. Check Photo Library before starting another upload.
  3. For a failed save or another-tab conflict, follow the displayed retry or reload instruction. Check the current settings before reapplying changes.
  4. For a stale preview, wait for saves to finish and use Refresh previews or the retry control.

Still stuck? Contact us with the gallery title or order number, what happened, your device and browser, and any support reference. Do not send passwords, payment-card details or private sign-in links.

Full guide: Something not working?
Search all help

Still need a hand? Contact us